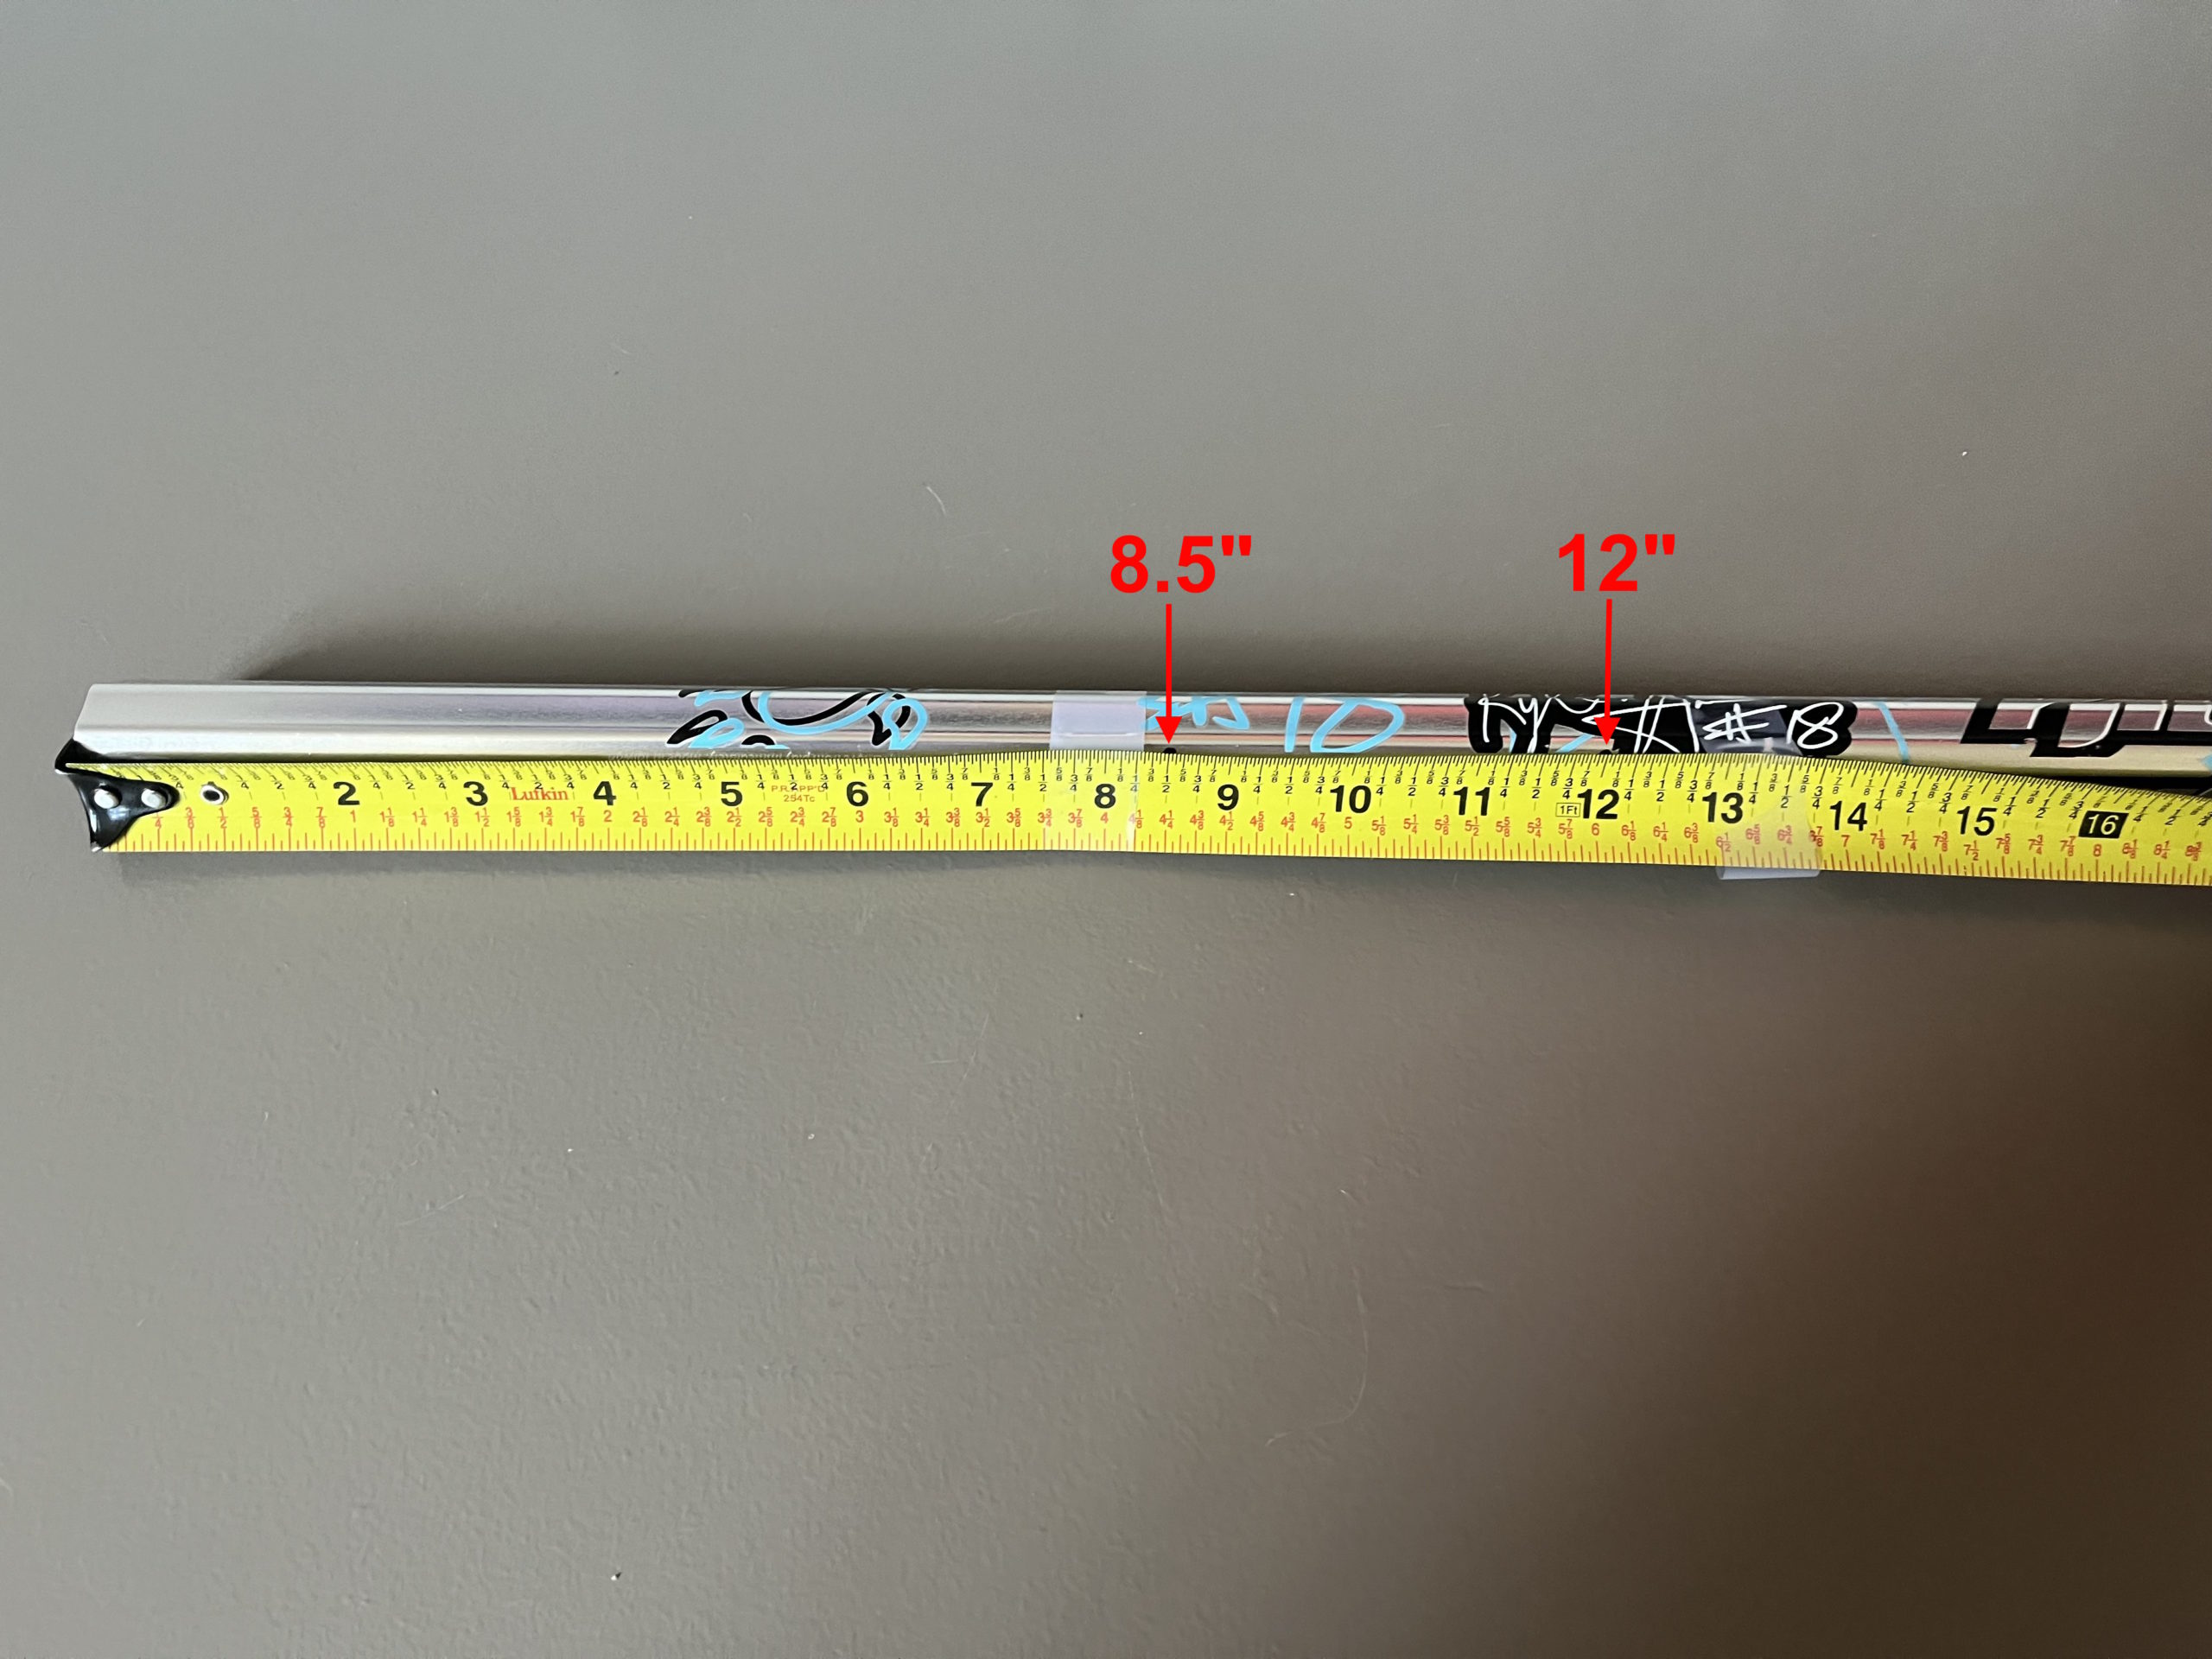
You need to drill the holes on the same side as the hole for the head – the back of the stick.
8.5″ and 12″ exactly
Drill hole with 1/8″ bit.
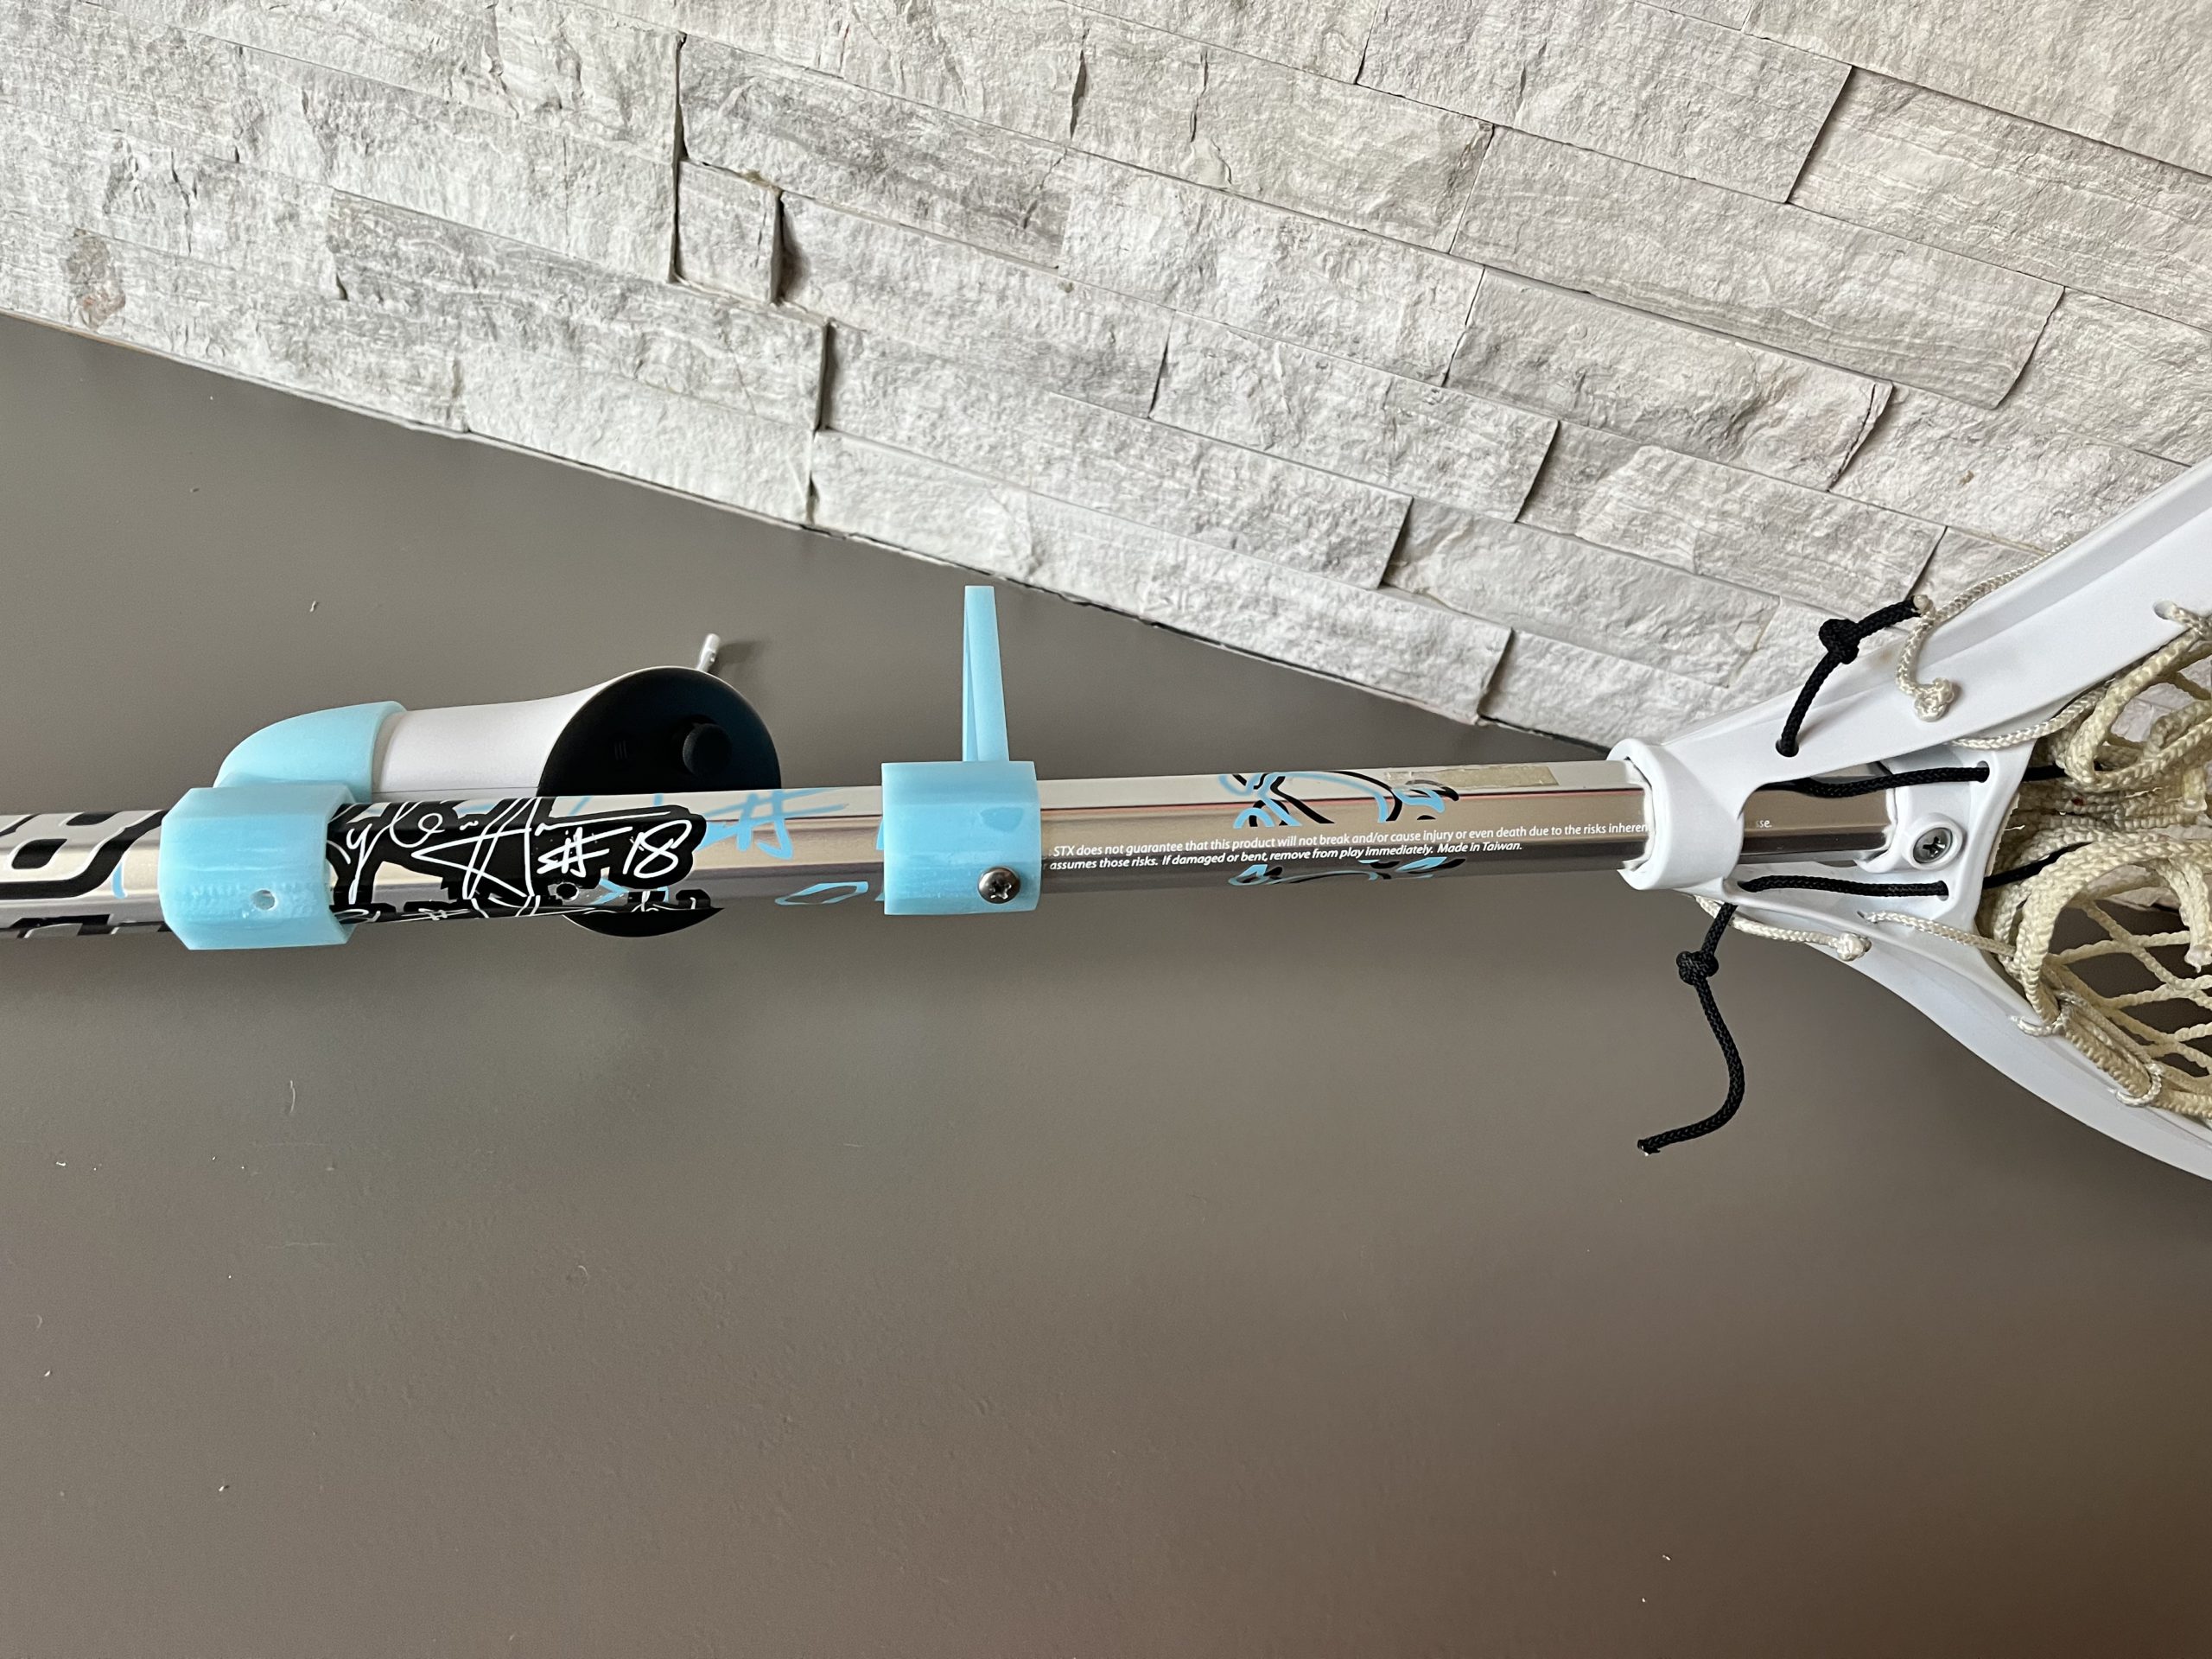
Position Controller
Attach the top mount as shown with the provided screw.
Slide the bottom mount onto the stick, and seat the LEFT HAND controller in the bottom mount. (Thread wrist strap through the hole in the bottom mount.)
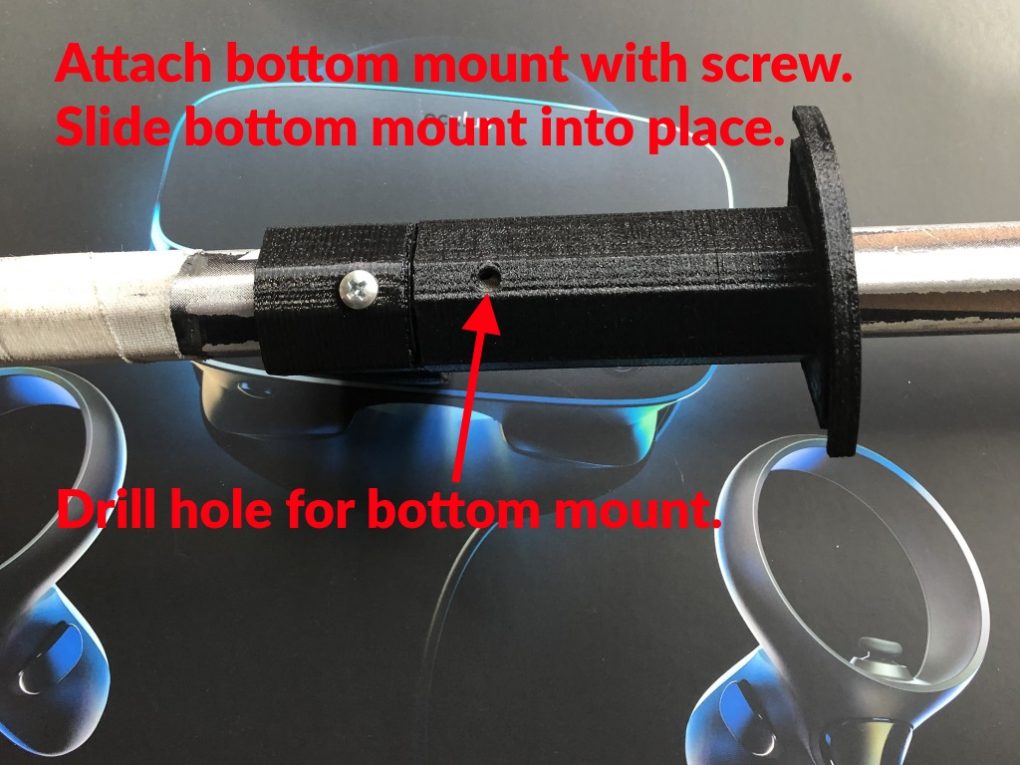
Attach Bottom Mount
Slide the bottom mount up, seating the top of the controller in the indentation in the top mount.
Position the screw and secure the bottom mount to the stick.
Finished Stick
Your stick should look like the photo.
To remove the controller, simply unscrew one of the mounts and slide it away from the controller.
Attach Your Quest 2 / Quest 1 / Rift-S Mount
Drill bottom hole
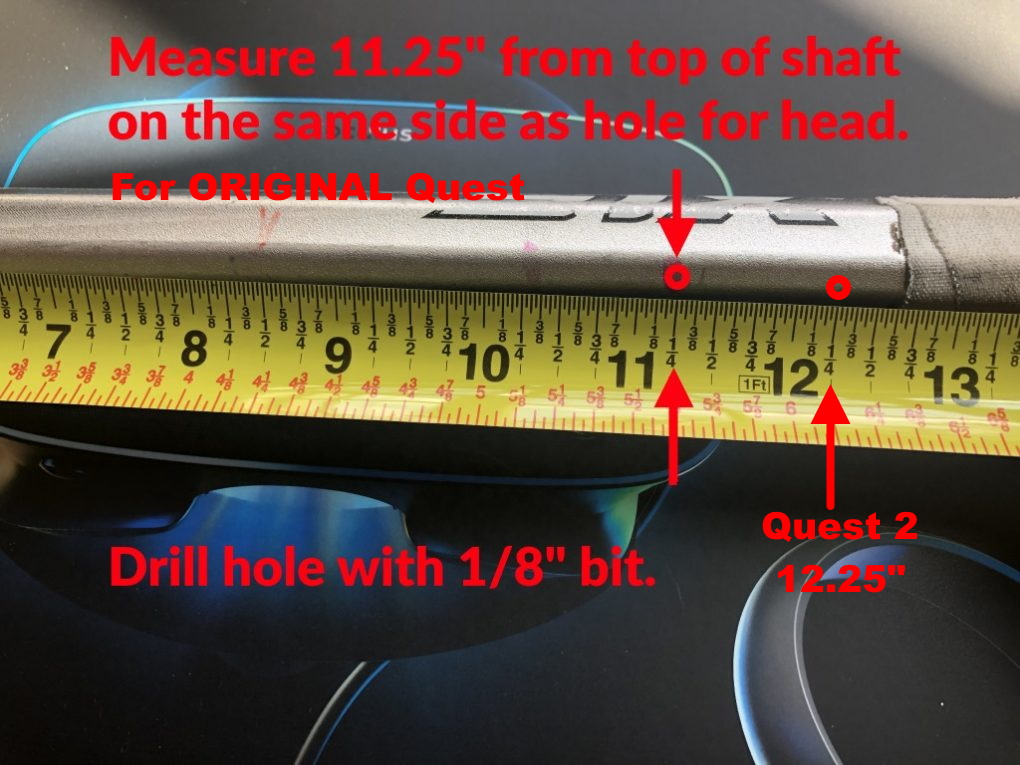
Measure from the TOP of the shaft.
You need to drill the hole on the same side as the hole for the head.
New Quest 2: Measure 12.25″ from the top. Mark it.
Original Quest 1 & Rift-S: Measure 11.25″ from the top. Mark it.
Drill hole with 1/8″ bit.
Drill top hole
Attach the bottom mount with the screw provided. The bottom mount looks like a cup.
Slide top mount so that it is firmly against the bottom mount.
The hole should be on the same side as the bottom mount.
Drill hole with 1/8″ bit.
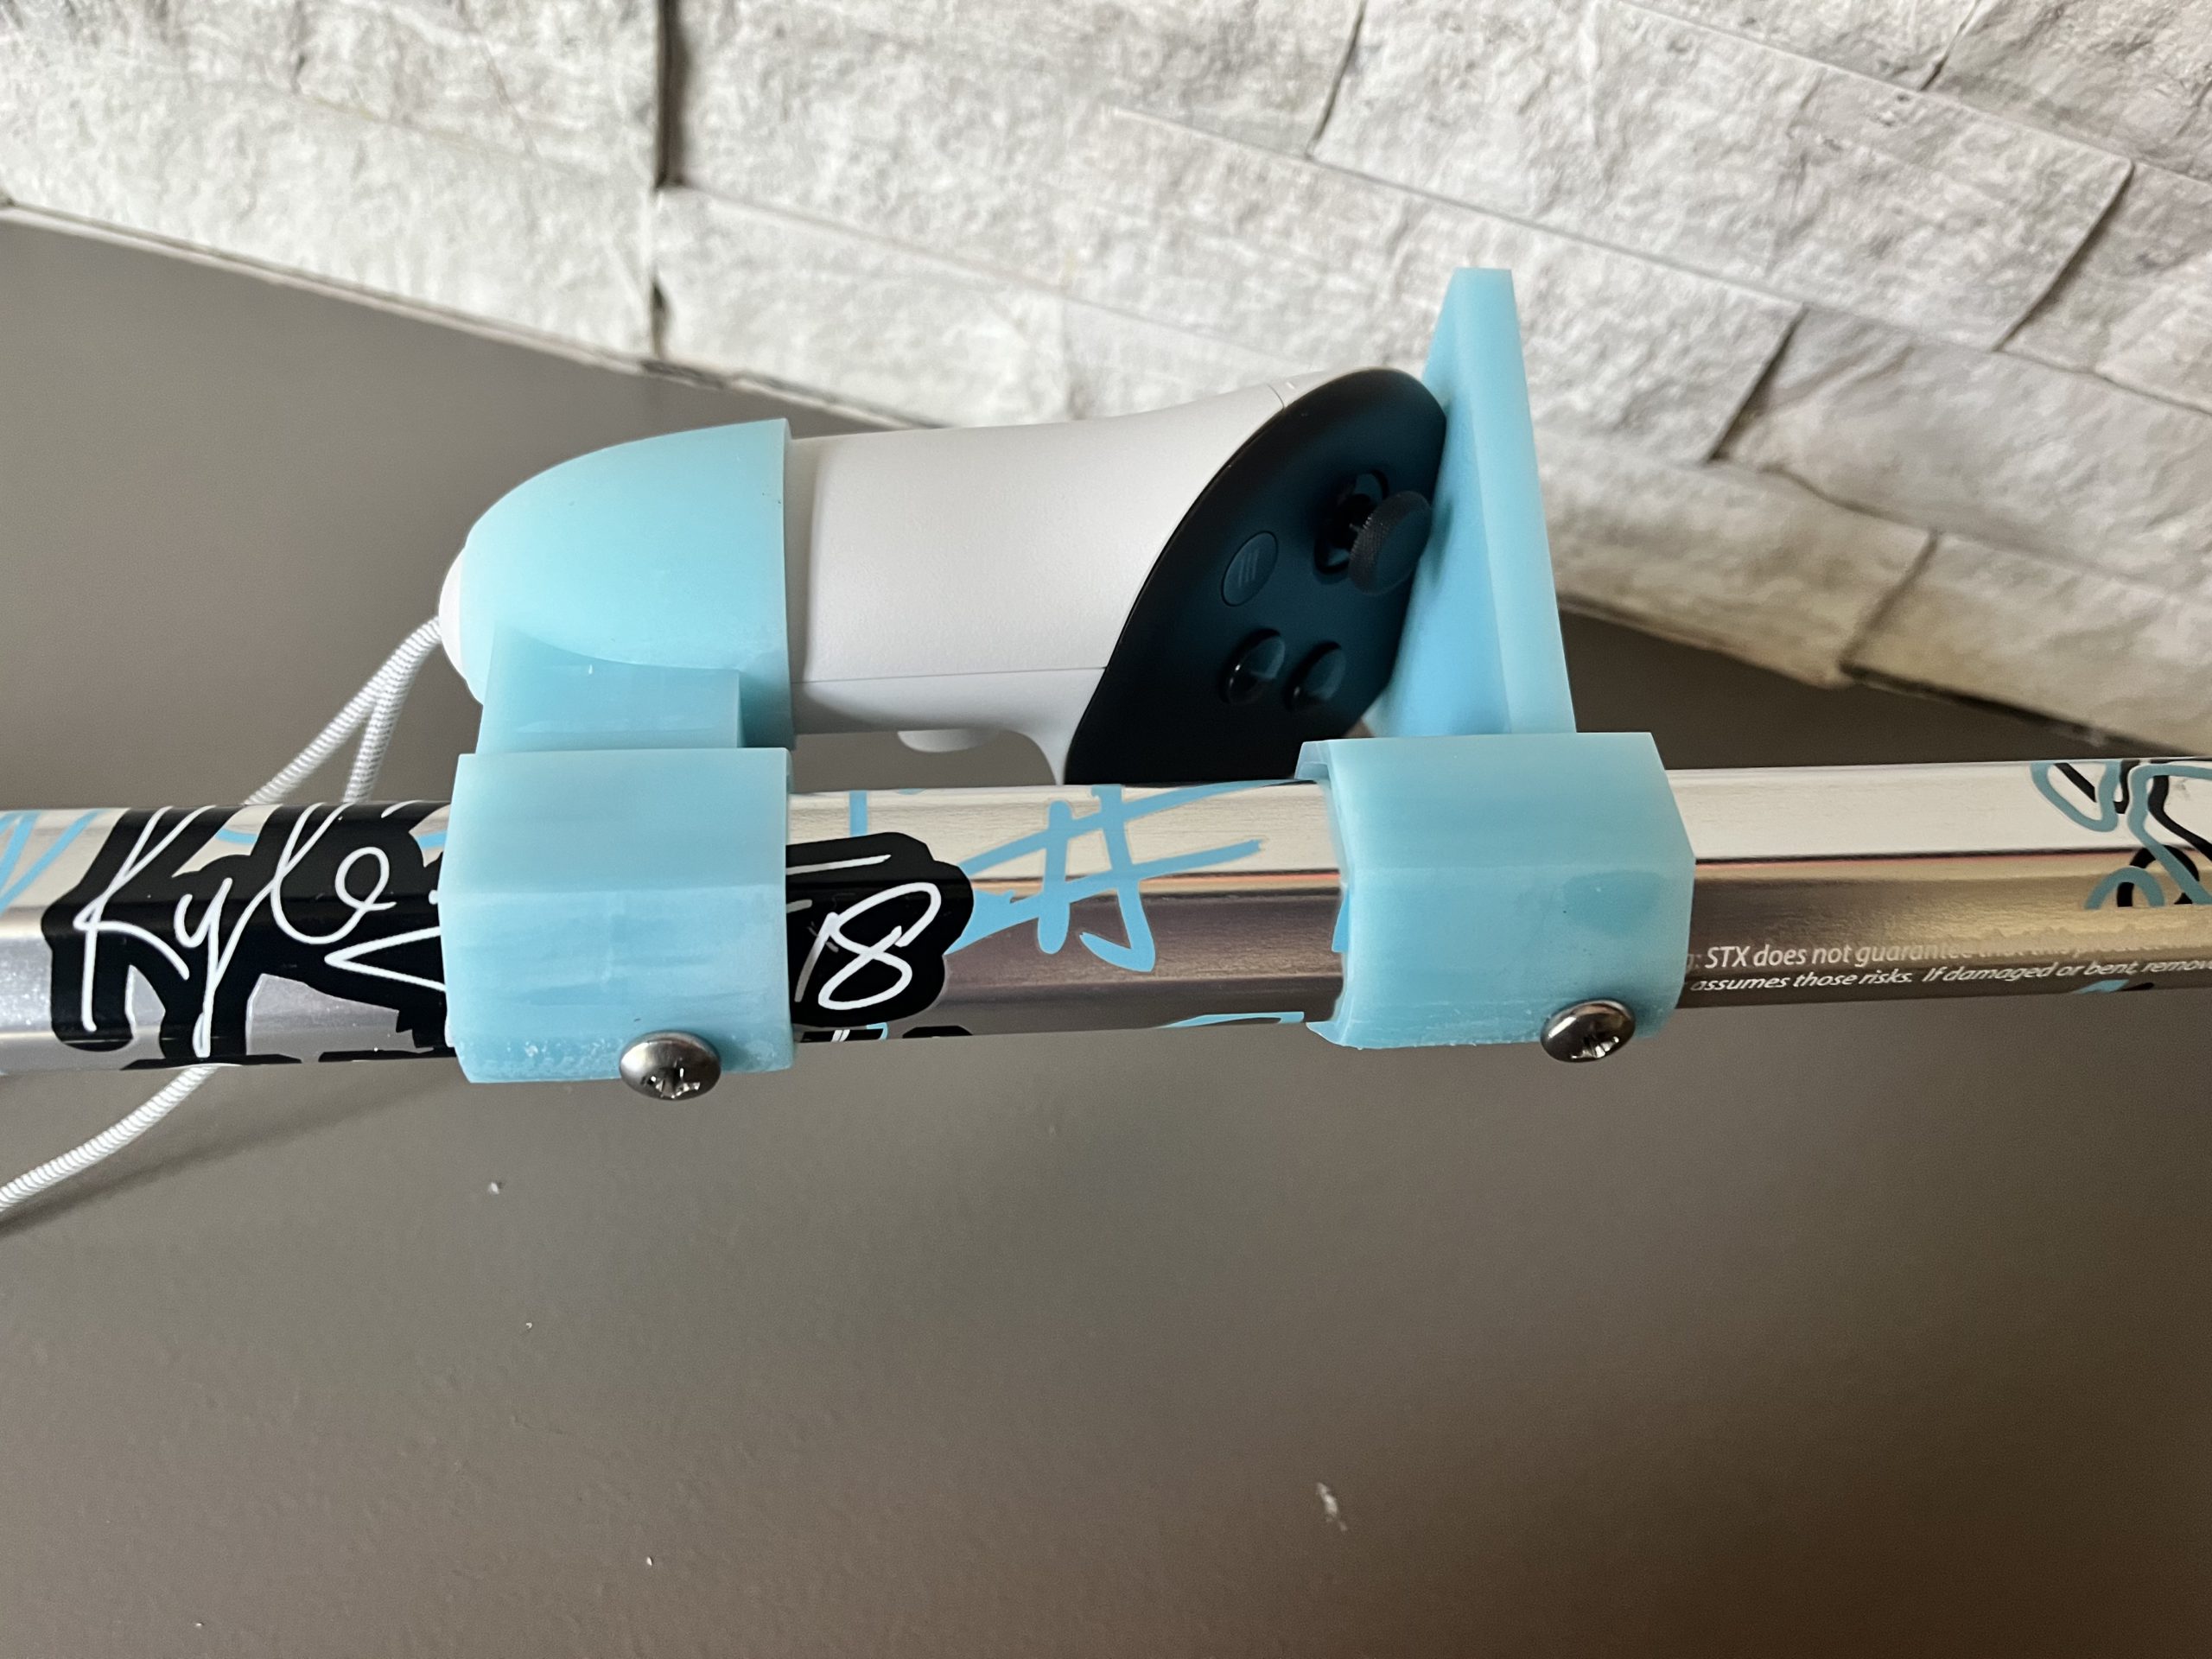
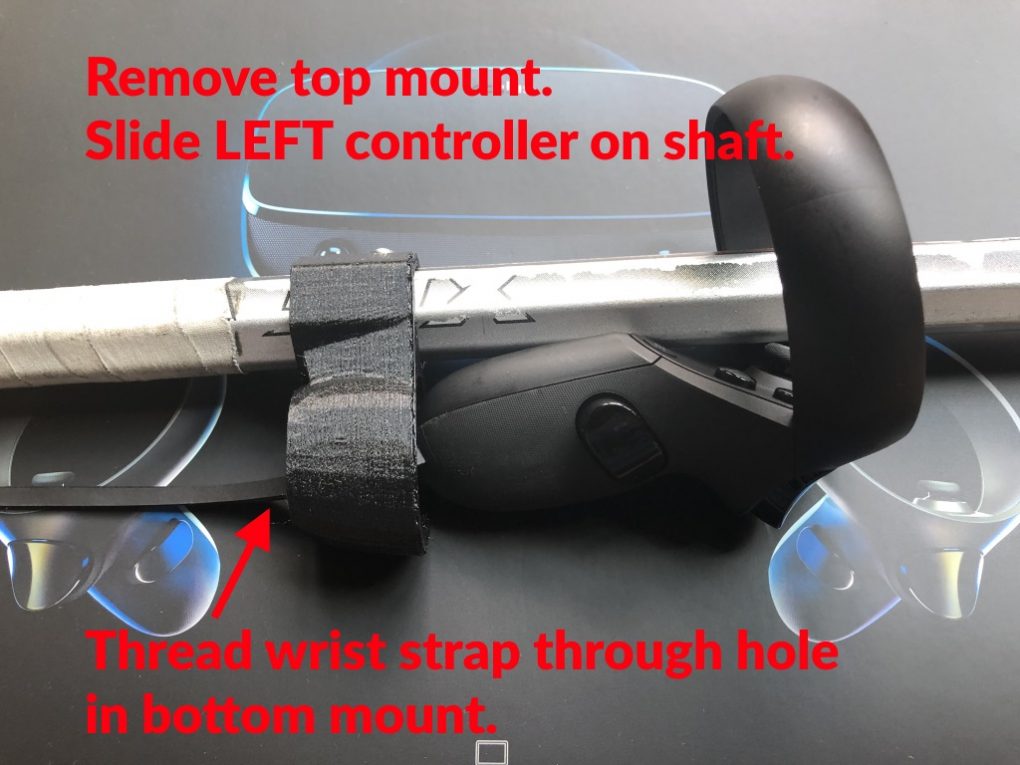
Position Controller
After removing the top mount, slide the LEFT HAND controller around the shaft.
Thread wrist strap through the hole in the bottom mount.
Thread the wrist strap through the hole in the bottom controller “cup”.
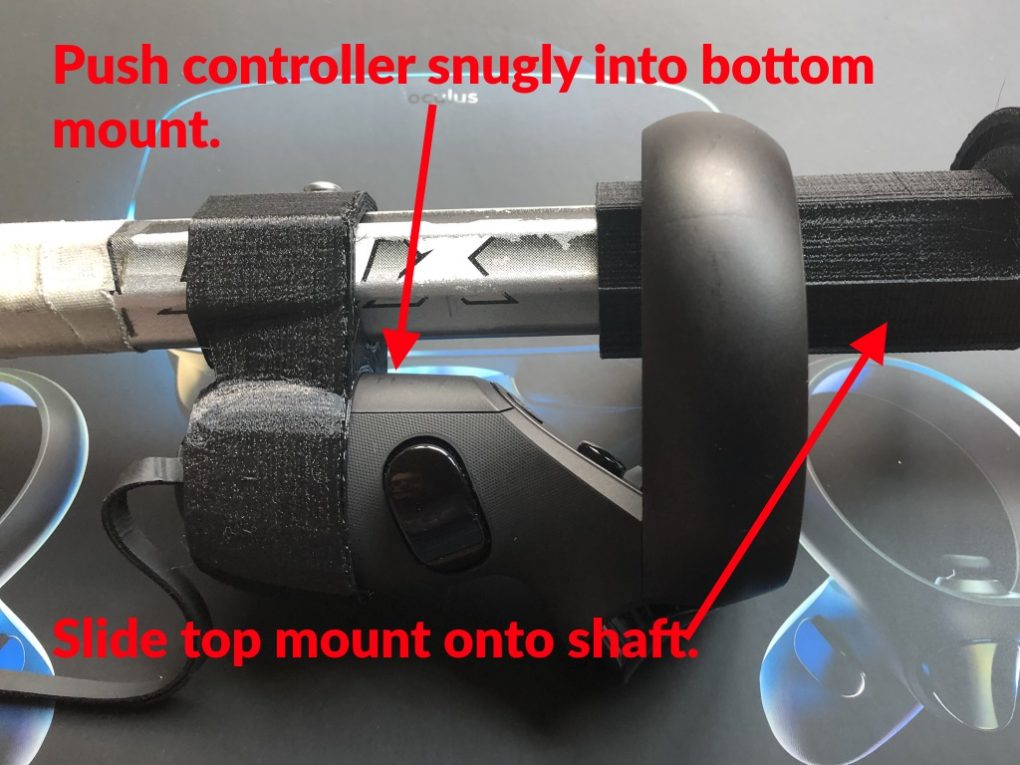
Seat the controller
Push the controller firmly into place in the cup of the bottom mount.
Slide the top mount onto the shaft, through the ring of the controller.
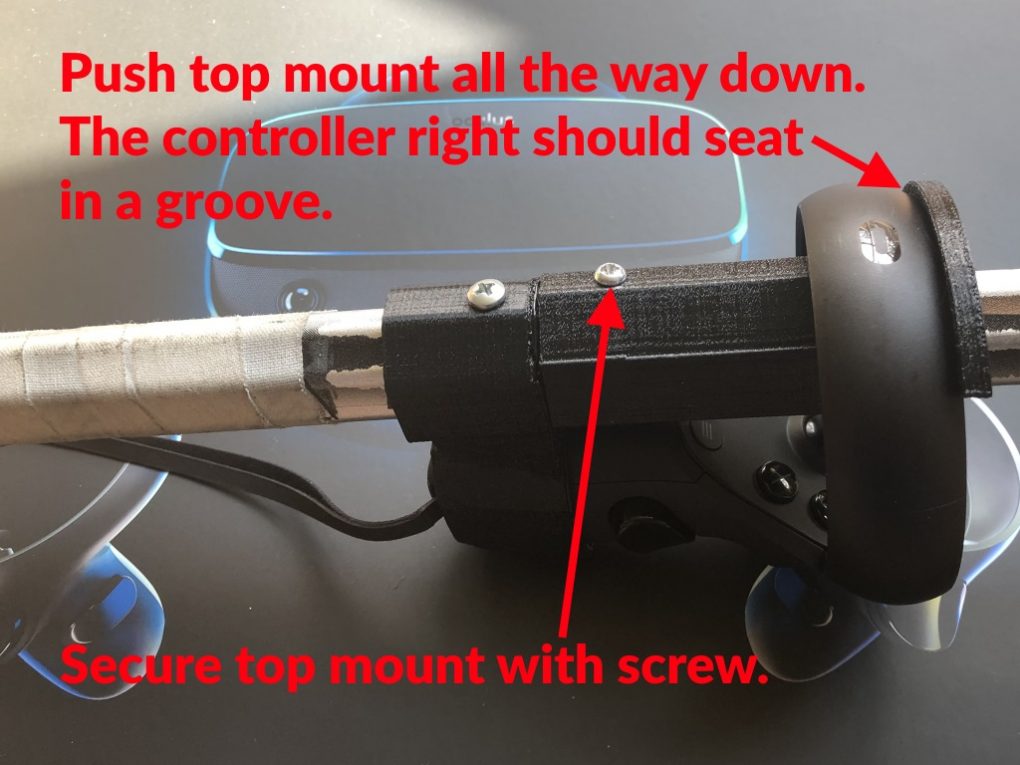
Attach top mount
Push the top mount all the way down.
The ring of the controller should seat into the groove in the top mount.
Secure the top mount with the provided screw.
You are ready to train!
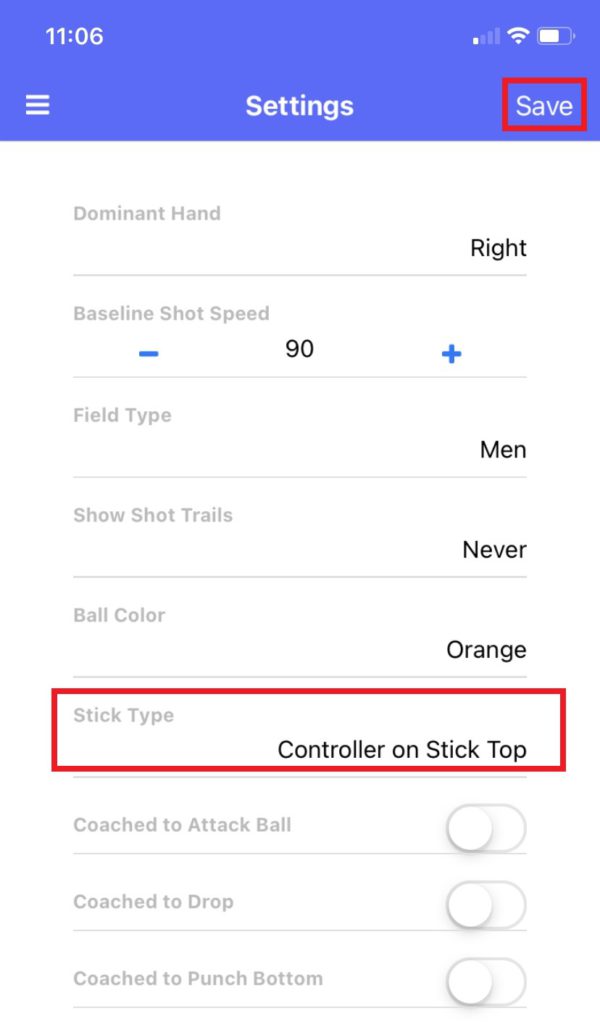
Update Your Settings
If you do not complete this step, the stick position will not work properly in VR.
Open the mobile app and sign in
Tap the “Burger” menu on the top left and tap “Settings”
Change the Stick Type to “Controller on Stick Top”